Candle Making for Beginners: Soy Wax, Wicks & Safety Basics
A calm beginner guide to candle making: pick soy wax, size a candle wick, set a safe workspace, pour and rest the jar, then burn-test before you gift.
In this article
- Why Soy Candle Making Works for Beginners
- Candle Making Supplies for Your First Batch
- How to Pick the Right Candle Wick
- How to Make Soy Candles: Prep and Melt
- Pouring, Centering, and Resting Your Candles
- Scent Load Without the Guesswork
- Set Up a Safe Melting Workspace
- Burn-Test Before You Share
- Your First-Batch Checklist
- Wrapping and Labeling Candles as Gifts
- Cleanup After a Candle Making Session
- Who Should Be Careful
- When to See a Doctor
- Candle Making FAQ
- Your Next Batch Starts Here
Soy candle making gives you a calm, hands-on project and a jar you can actually use. If you can melt butter and watch a pot, you can learn candle making at your kitchen table with a few simple supplies.
This guide keeps things practical. You will choose clean materials, match a candle wick to your jar, add scent without guessing, and burn-test before you gift anything. Safety comes first in every step, because you will work with hot wax, hot glass, and an open flame. Plan one relaxed afternoon for your first batch. If you like slow weekend crafts, you can also try pressed flowers this fall.
What you will get from this guide:
- A short supply list for your first soy batch.
- A clear walk-through of how to make soy candles, start to finish.
- Simple rules for picking and trimming a candle wick.
- A scent approach that follows supplier charts instead of guesswork.
- A first-batch checklist table you can print.
- Gift wrapping and labeling ideas that stay honest.
From Our Garden
I already made candles with wax and wicks, and what surprised me was how easy it was.
That is one person's experience, not proof, and your results may vary.
Why Soy Candle Making Works for Beginners
Soy wax forgives a lot of small mistakes.
It melts at a gentle range, cleans up with warm soapy water, and comes in easy-to-measure flakes. That makes soy candle making a friendly entry point if you have never poured wax before.
Container candles keep your first candle making project simple. Then you pour, wait, and trim.
Here is why many people start with soy container candles:
- Low setup cost. A pot, a pitcher, a thermometer, and a few jars cover most of it.
- Room to learn. Small batches let you test one change at a time.
Keep expectations realistic. Your first candles may tunnel, frost, or show rough tops. Still, those quirks simply tell you what to adjust, and that feedback loop makes candle making a satisfying slow hobby.
Candle Making Supplies for Your First Batch
Start small and buy generic, well-labeled supplies.
You do not need a fancy kit. Instead, you need materials with clear instructions, because those instructions guide your temperatures and scent amounts.
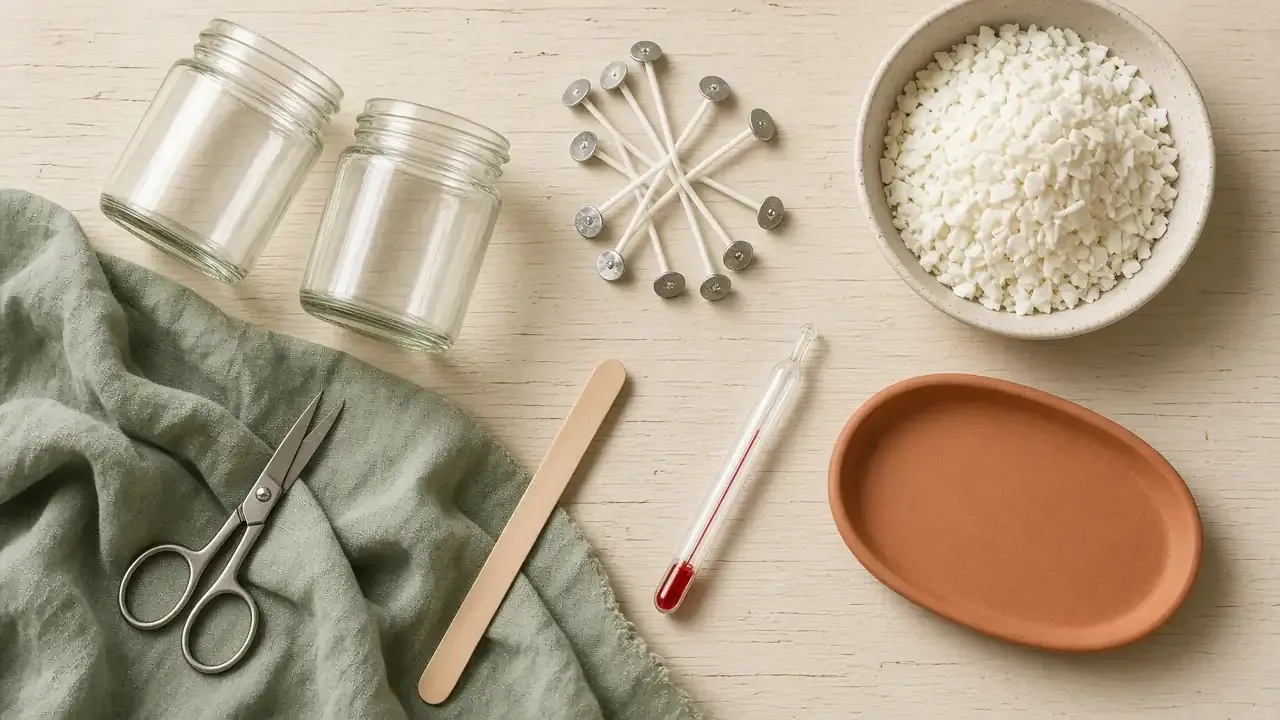
Here is what you need to learn how to make soy candles:
- Soy wax flakes made for container candles.
- Pre-tabbed cotton or wood wicks sized for your jar.
- Heat-safe glass jars or tins made for candles.
- A thermometer you trust.
- A pouring pitcher with a handle and spout.
- A large pot to use as a water bath.
- A kitchen scale for wax and fragrance.
- Wick stickers and centering bars (clothespins work too).
- Candle-grade fragrance oil (optional).
- Labels and warning stickers.
Keep candle tools separate from food tools. A thrift-store pot and pitcher make a good dedicated set.
Read every supplier sheet before you start. First, your wax supplier lists melt, fragrance-add, and pour temperatures. Also, your fragrance supplier lists a maximum load and a flash point.
Buy a few extra wicks in nearby sizes too. After all, wick testing sits at the heart of good candle making, and spares save you a second order.
How to Pick the Right Candle Wick
Your wick decides how your candle burns.
A candle wick that runs too small leaves a narrow hole down the middle. One that runs too large makes a tall flame, extra heat, and soot.
Start with your jar's inside diameter. Most wick suppliers publish a sizing chart that matches wick size to container width and wax type. So pick the suggested size for soy, then buy one size up and one down for testing.
A few basics help you choose:
- Cotton wicks give a steady, familiar flame.
- Wood wicks make a flat, wide flame and sometimes a soft crackle.
- Fragrance and dye can change the burn, so test your exact recipe.
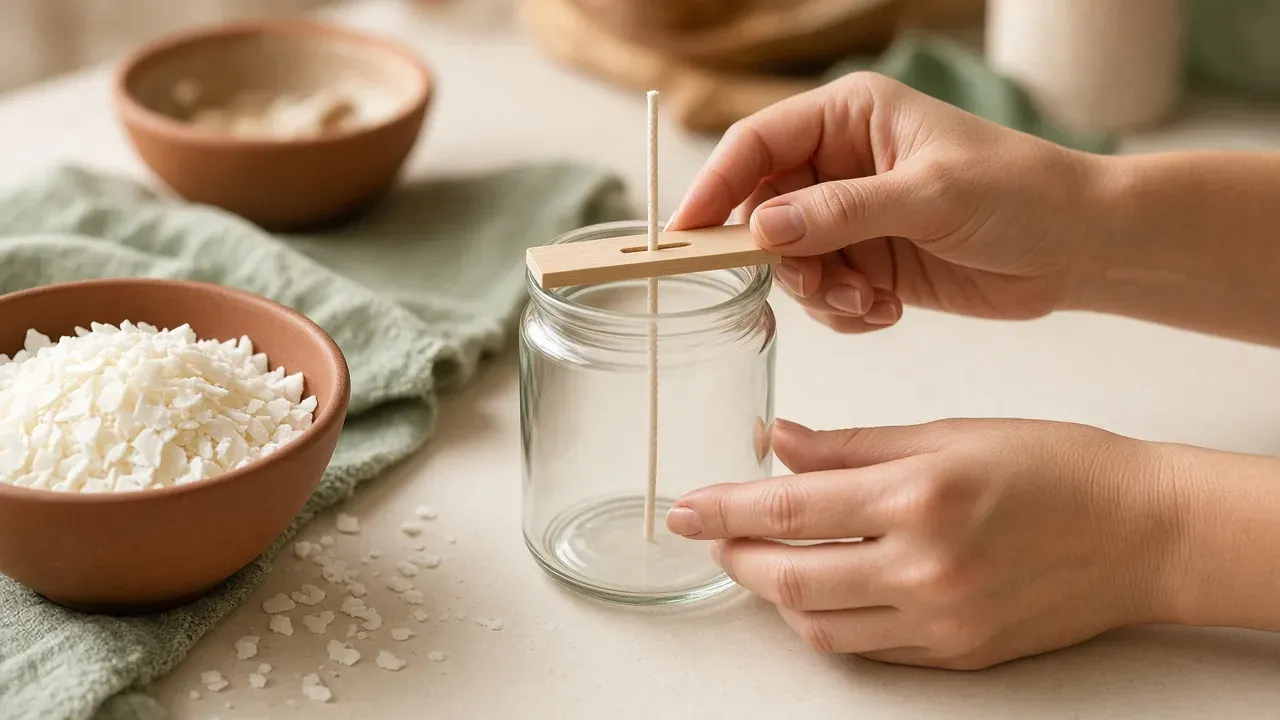
Centering matters as much as size. An off-center candle wick melts one side faster and heats one wall of the glass more. Therefore, stick the tab firmly to the jar bottom and hold the top straight with a centering bar.
Once your candle sets, trim before every burn. The University of Colorado Boulder's CU Boulder candle safety guidelines recommend trimming candlewicks to 1/4 inch each time before burning. Likewise, the same page notes that long or crooked wicks cause uneven burning and dripping.
How to Make Soy Candles: Prep and Melt
Good prep makes the pour feel easy.
Clear a stable counter, cover it with paper or a silicone mat, and keep kids and pets out of the room.
Follow these steps:
- Clean and warm your jars. Slightly warm jars help wax stick to the glass.
- Attach the wick. Press a wick sticker onto the tab and set it in the exact center of the jar.
- Weigh your wax. Use the jar's capacity as a rough guide, then adjust after your first pour.
- Set up a water bath. Place your pouring pitcher inside a pot of simmering water. This double boiler method keeps wax away from direct heat.
- Melt slowly and stay close. Clip your thermometer to the pitcher and check it often.
Never leave melting wax unattended, even for a quick phone call. If you must step away, turn off the heat first. Meanwhile, keep the water topped up so the pot never boils dry.
Avoid setting a wax pot straight on a burner, because direct heat makes temperature harder to control. If the wax starts to smoke, turn off the heat right away. Also, keep a metal lid nearby, and never use water on a wax fire.
This part of how to make soy candles feels slow. Yet that pace works in your favor, because rushing the melt invites accidents.
Never heat wax past the highest temperature on your supplier sheet, because overheated wax can reach its flash point and catch fire.
Pouring, Centering, and Resting Your Candles
Now you shape the actual candle.
When the wax reaches your supplier's fragrance-add temperature, move the pitcher to a trivet.
Finish the batch:
- Add fragrance if you use it. Weigh it, pour it in, and stir gently for a minute or two.
- Cool to pour temperature. Your wax supplier lists this number.
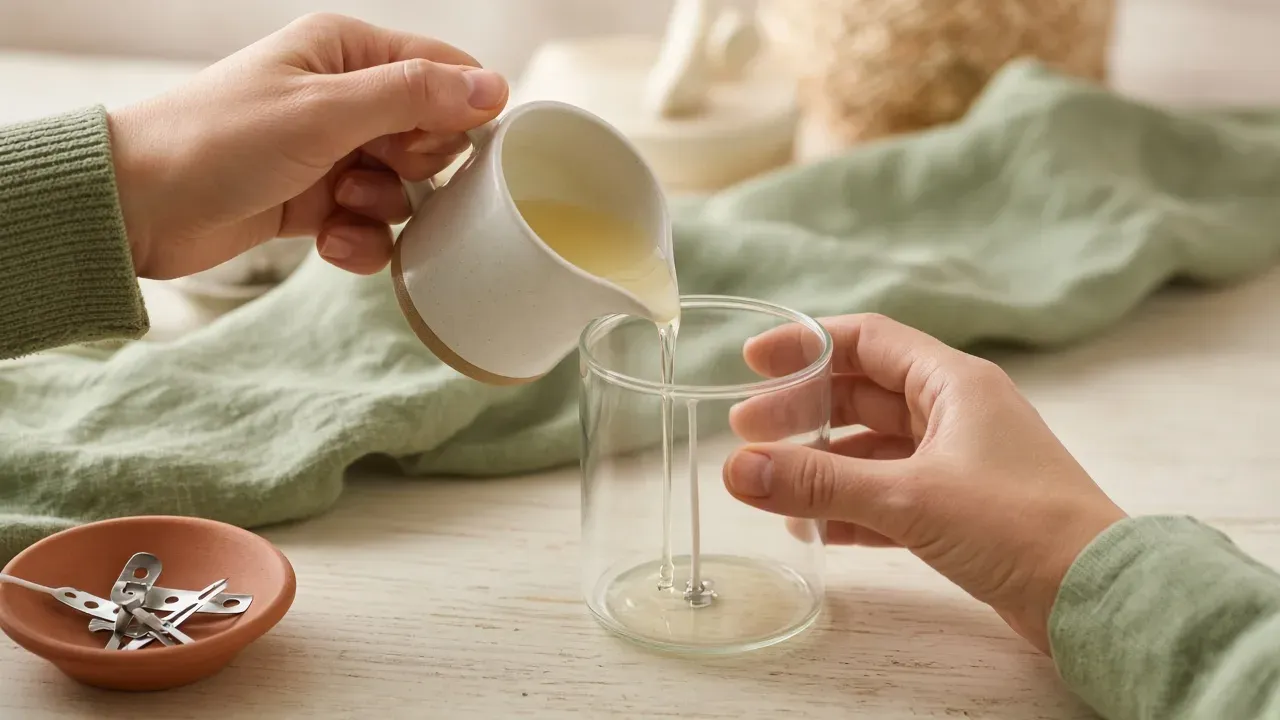
- Pour slowly. Hold the pitcher low and pour along the inside of the jar to limit bubbles.
- Center the wick. Rest a centering bar across the rim and slide the wick into the middle.
- Leave it alone. Let the candle set on a flat surface, away from drafts.
- Trim and wait. Once hard, trim the wick and let the candle rest.
That rest gives soy wax and fragrance time to settle together. Many wax and fragrance suppliers suggest letting soy candles rest for several days before the first light. So check your supplier's sheet instead of guessing.
Do not move a jar while the wax stays liquid. Hot glass and sloshing wax can burn your hand, so wait until the candle feels set and cool before you lift it.
Small top flaws are normal, and a quick second pour can smooth them. Afterwards, note your pour and room temperatures so your next round of candle making goes smoother.
Scent Load Without the Guesswork
Scent load means how much fragrance you add.
However, overloading can cause oily seepage, a weak burn, or soot.
The simplest rule: follow the wax and fragrance supplier's load chart. Your wax supplier lists the maximum load that wax can hold, and your fragrance supplier may list its own. Stay at or below the lower number.
A few habits keep scent safe:
- Weigh, do not eyeball. A scale gives repeatable results.
- Start low if unsure. You can add more next batch.
- Use candle-grade fragrance that the supplier labels for candles.
- Wear gloves. Undiluted fragrance oil can irritate skin.
Essential oils need extra thought. Some throw little scent in candles, and some people find them irritating when concentrated. If you use them, choose ones the supplier lists for candles and follow its guidance. Also, cap the bottles tightly and store them out of reach of children and pets.
Scent affects people differently. In fact, a fragrance you love can bother someone with asthma or a sensitive nose. Unscented soy candles make a thoughtful gift, and they remove one variable from early candle making tests. Another calm kitchen craft, when you make beeswax wraps at home, also rewards careful labels and slow steps.
Set Up a Safe Melting Workspace
Your workspace protects you as much as your technique.
- Clear the counter of towels, paper, and anything that can burn.
- Ventilate with an open window or the stove hood.
- Dress for it in closed shoes, long sleeves, and old clothes.
- Use oven mitts, because pitchers and jars heat up fast.
Water and hot wax do not mix. The CU Boulder Fire and Life-Safety Group notes that water can make hot wax spatter and can break glass containers. Indeed, that warning covers finished candles, and it makes even more sense near a pitcher of melted wax.
Pick a time when you can stay focused for the whole session. Overall, candle making rewards slow, deliberate attention, especially during the melt and pour.
Burn-Test Before You Share
Always test a candle before you give it away.
Light it on a heat-safe surface, stay in the room, and watch the melt pool, flame height, and any smoke.
Common issues and what they usually mean:
- Tunneling (a hole down the middle): the wick may run too small, or the burn stayed too short.
- Mushrooming (a carbon cap on the wick): the wick may run too large or need a trim.
- Soot or black smoke: trim the wick, check for drafts, and consider a smaller size.
- Tall, flickering flame: extinguish, let it cool, trim, and relight.
The CU Boulder guidelines advise keeping candles away from drafts, vents, and fans, since air currents can cause uneven burning and smoking. In addition, they recommend keeping the wax pool free of wick trimmings and matches.
Burn-test to the end at least once. The same guidelines suggest you stop burning a container candle when about 1/2 inch of wax remains. As a result, that margin helps protect the surface underneath and lowers the chance of glass cracking.
Write everything down. Then each note turns your next round of candle making into a smarter experiment.
Your First-Batch Checklist
Print this table and keep it near your workspace.
| Step | What to check | Why it matters |
|---|---|---|
| Supplies | Wax, wicks, jars, thermometer, scale | Missing tools lead to rushed choices |
| Supplier sheets | Melt, fragrance-add, and pour temperatures | Each wax behaves differently |
| Workspace | Clear counter, mat, ventilation, metal lid | Fewer spills, faster response |
| Wick | Size from chart, tab centered, bar on top | Even melt pool, steady flame |
| Melt | Water bath, thermometer in, never unattended | Better heat control |
| Fragrance | Weighed, within the supplier load chart | Cleaner burn |
| Pour | Slow, low, along the glass | Fewer bubbles |
| Rest | Several days, per supplier advice | Better scent and burn |
| Test burn | Melt pool, flame height, soot | Catch problems before gifting |
| Label | Contents and safety warnings | Helps people burn it safely |
If a row stays unchecked, pause and fix it before you heat any wax. Finally, this habit keeps candle making calm instead of chaotic.
Wrapping and Labeling Candles as Gifts
Homemade candles make warm, personal gifts.
Start with a clean jar, wipe off drips, trim the wick, and add a lid if you have one.
Your label should include:
- The scent name or "unscented".
- Wax type, such as soy wax.
- A burn time estimate, only if you tested it, marked "approximate".
- Safety warnings, such as trim the wick and never leave burning unattended.
- Your initials and the pour date.
Do not invent burn times. Instead, burn one candle from the same batch yourself, track the hours, and round down. If you skip that test, leave burn time off the label.
Also avoid tucking dried flowers or ribbon near the wick, since loose decor near a flame can catch fire.
Add a short care card that says to burn the candle on a heat-safe surface, away from kids, pets, and curtains. That small note makes your candle making gift both thoughtful and safety-minded. If you like tidy kitchen crafts, you can also stock a kitchen herbal apothecary with the same careful labeling habit.
Cleanup After a Candle Making Session
Clean while the wax stays soft.
Soy wax wipes away much more easily when warm.
- Wipe the pitcher with paper towels while it feels warm, not hot.
- Wash tools with hot soapy water.
- Scrape cooled drips off counters with a plastic scraper.
- Pour leftover wax into a lined tray, let it harden, and save it for a test candle.
Never pour liquid wax down the sink. Otherwise, it hardens in pipes and can cause clogs.
Store supplies in a labeled bin, away from heat and out of reach of children. Cap fragrance bottles tightly. Then a tidy kit makes your next candle making session faster and safer.
Who Should Be Careful
Candle making calls for extra caution in some homes.
Hot glass and liquid wax can burn skin quickly, and every lit candle stays an open flame.
Take extra care if this applies to you:
- Young children live with you or visit often. Keep matches, lighters, hot wax, and lit candles out of reach. The CPSC holiday decorating safety tips advise keeping candles on a stable, heat-resistant surface where children and pets cannot reach them or knock them over.
- Someone at home has asthma or breathing sensitivity. Smoke and strong fragrance may bother them. Ventilate well and consider unscented candles.
- Anyone at home uses medical oxygen. Keep all open flames away from it.
Placement matters too. The NFPA home candle safety page says more than half of home candle fires started when something that can burn sat too close to the candle. Therefore, NFPA recommends keeping candles at least 12 inches from anything that can burn.
The U.S. Fire Administration candle tips recommend stable holders, blowing out candles when you leave a room or go to bed, and avoiding lit candles in bedrooms and sleeping areas. It also suggests battery-operated flameless candles as an option.
CPSC adds that you should keep burning candles within sight and put them out before you leave the room. Also, let a candle cool fully before you move it.
Trim the wick to 1/4 inch before each burn, as the CU Boulder guidelines recommend.
When to See a Doctor
Get medical help for serious burns or breathing trouble.
This section does not replace care from a clinician.
According to MedlinePlus burn first aid guidance from the U.S. National Library of Medicine, burns that blister affect deeper layers of skin. MedlinePlus advises calling 911 or your local emergency number when:
- The burn looks about the size of your palm or larger.
- The burn looks severe, or you feel unsure how serious it is.
- Someone breathed in smoke.
- The person shows signs of shock, such as pale, clammy skin or weakness.
MedlinePlus lists coughing, wheezing, voice changes, and difficulty breathing as possible signs of an airway burn. So if you notice any of these after smoke exposure, call emergency services.
Seek care right away in these cases too:
- Hot wax or debris gets into an eye.
- A burn blisters on the face, hands, feet, or over a joint.
- A child gets burned. MedlinePlus notes that young children face a higher chance of complications from severe burns.
- A burn shows signs of infection, such as pus, fever, or spreading redness.
For a minor burn, MedlinePlus says to contact your provider if pain lasts beyond 48 hours. It also warns against putting butter, oil, or ice on a severe burn. When in doubt, call your doctor or emergency services instead of trying home fixes first.
Candle Making FAQ
These answers stay short and practical.
Use them as a quick check before your next pour.
Is soy wax better than paraffin?
Soy wax suits beginners because it melts gently and cleans up easily.
Both waxes work for candle making, so pick the one whose supplier gives clear instructions first.
How long should soy candles rest before burning?
Check your wax supplier's guidance first.
Many suggest several days so the fragrance settles before the first light begins.
What size candle wick do I need?
Use your wick supplier's chart for your jar diameter and wax.
Then burn-test one size up and one down next.
Why does my candle tunnel?
Your wick may run too small, or early burns stayed too short.
Test a larger size.
How much fragrance should I add?
Follow the wax and fragrance supplier's load chart.
Start low if you feel unsure.
Can kids help with candle making?
Older kids can help with labels and wrapping, away from heat.
Adults should handle melting, pouring, and lighting.
Your Next Batch Starts Here
You now have a simple, safety-first plan.
Keep your first batch small. Burn-test every recipe, write down what you learn, and change one thing at a time. Above all, that steady approach helps you master how to make soy candles without wasted wax or risky shortcuts.
Most of all, respect the flame. Trim the wick, keep candles 12 inches from anything that can burn, and blow them out before you leave the room or go to bed. Finally, do that, and candle making can become a cozy, creative habit you enjoy for years.
You may also like
How to Hygge This Fall: 15 Cozy, Low-Cost Rituals for Shorter Days
Hygge is the Danish habit of slowing down for warm, simple moments. Try 15 low-cost fall rituals, from soup nights to go…

Earthing 101: How to Try Grounding and What Research Says
Curious about earthing? Learn what grounding involves, six simple daily rituals, safety tips for every season, and what…
A Slow Fall Guide to Pressed Flowers
Set aside one dry hour, press a few legal stems, and write five lines before you go inside. Leave the rest of the patch…