Bone Broth Recipe: Old-Fashioned Slow Cooker and Stovetop Methods
This old-fashioned bone broth recipe walks you through roasting bones, a splash of vinegar, stovetop and slow cooker methods, the gel test, and safe storage.
Jump to recipe ↓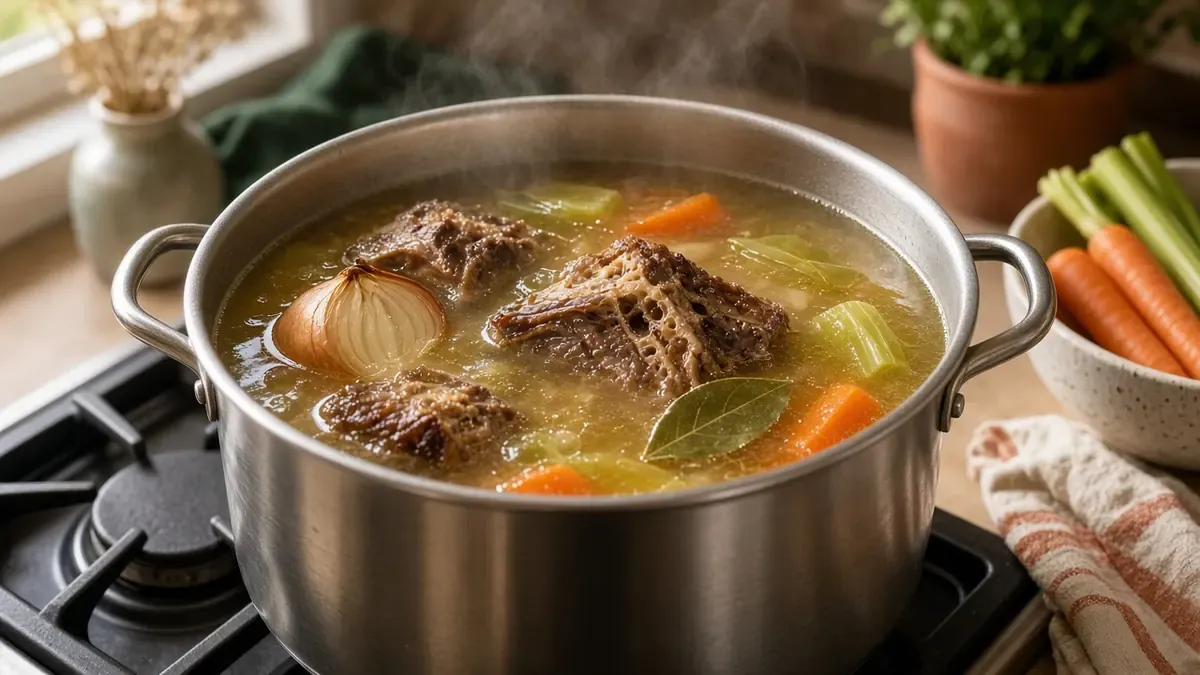
In this article
- What Is Bone Broth?
- Choosing the Right Bones
- Ingredients for This Bone Broth Recipe
- Roasting the Bones and the Vinegar Trick
- Stovetop Bone Broth Method
- Slow Cooker Bone Broth Method
- Straining, Cooling, and Skimming
- The Bone Broth Gel Test
- How to Store and Freeze Bone Broth
- Food Safety Basics
- Common Mistakes to Avoid
- Who Should Be Careful
- When to See a Doctor
- Bone Broth FAQ
- Ways to Enjoy Your Broth on Cold Nights
Bone broth is one of the oldest cold-season comfort foods in the kitchen. You simmer roasted bones in water for hours, and you end up with a rich, golden pot that can turn into soup, gravy, or a warm mug on a gray day.
This guide walks you through the old-fashioned way, step by step. First, you pick and roast the bones. Then you add a splash of vinegar, choose the stovetop or the slow cooker, and wait. Finally, you strain, chill, and check for that wobbly gel.
You also get clear food safety rules from official sources. A big pot of broth cools slowly, so the cooling and storage steps matter just as much as the simmering.
What you will get from this guide:
- How this broth differs from stock.
- Which bones to buy and how to roast them.
- A stovetop method and a slow cooker method.
- The gel test and what it tells you.
- How to cool, store, and freeze your broth.
- Food safety tips from USDA and FoodSafety.gov.
What Is Bone Broth?
Bone broth is a long-simmered liquid made mostly from bones. It cooks longer than most stocks.
Cooks usually simmer the bones for many hours, often with a few vegetables and herbs. The long, slow heat pulls flavor and body out of the bones and the connective tissue around them. As a result, the finished broth tastes deep and feels rich on the tongue.
So what about bone broth vs stock? In everyday kitchens, the two overlap a lot. Still, a few patterns stand out:
- Stock often cooks for a few hours. The long-simmered kind usually cooks much longer.
- Cooks often use stock as a base for sauces and soups. However, many people sip broth on its own, too.
- Long-simmered recipes tend to use more bony, gelatin-rich parts, such as feet, wings, and knuckles.
In short, the line is blurry. Think of it as a long, slow, extra-rich stock. Either way, the method below works for both.
Choosing the Right Bones
Good bones make good broth. Mix a few types for the best flavor and body.
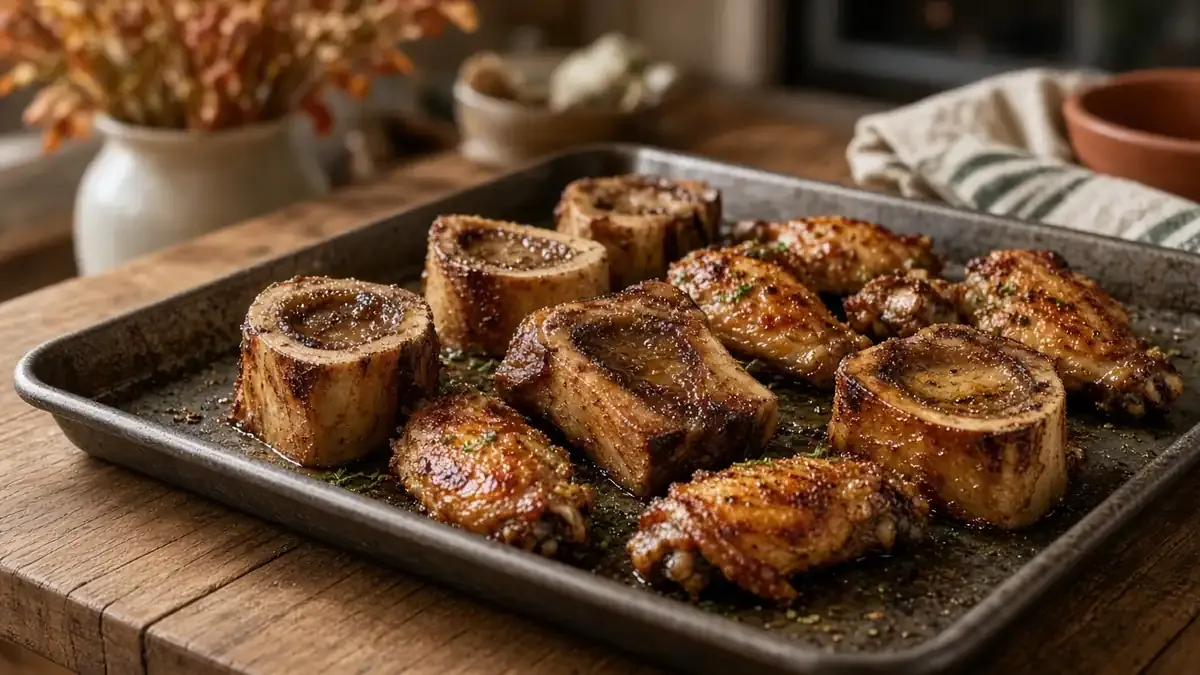
For chicken broth, use backs, necks, wings, and feet. Feet and wings add lots of gelatin, which helps the broth set. A leftover roast chicken frame works well, too.
For beef broth, ask the butcher for marrow bones, knuckle bones, oxtail, and short rib bones. Knuckles bring body, while meaty bones bring flavor. Pork trotters also add plenty of gel, if you can find them.
Here are a few simple tips:
- Mix meaty bones with bony, cartilage-rich pieces.
- Keep raw bones cold until you cook them.
- Thaw frozen bones in the fridge before they go into a slow cooker.
That last point comes straight from the USDA. Its slow cooker safety guide says to always thaw meat or poultry before you put it in a slow cooker.
Ingredients for This Bone Broth Recipe
The list is short and cheap. Most of it may already sit in your kitchen.
| Ingredient | Amount | Role |
|---|---|---|
| Beef or chicken bones | 3 to 4 pounds | Flavor and body |
| Cold water | About 4 quarts, enough to cover | Cooking liquid |
| Apple cider vinegar | 1 to 2 tablespoons | Traditional splash |
| Onion | 1 large, halved | Sweetness |
| Carrots | 2, in chunks | Sweetness and color |
| Celery | 2 stalks | Savory flavor |
| Garlic | 1 head, halved | Depth |
| Bay leaves | 2 | Aroma |
| Black peppercorns | 1 teaspoon | Gentle heat |
| Salt | To taste, at the end | Seasoning |
Keep the salt for the end. Broth cooks down over time, so early salt can make it too salty. Also, you may use the broth later in a dish that already has salt.
This bone broth recipe makes about 3 to 4 quarts, depending on how long you simmer it. You can halve it for a smaller pot.
Roasting the Bones and the Vinegar Trick
Roasting adds deep, toasty flavor. It also gives the broth a darker color.
To roast, heat the oven to 425°F. Spread the bones on a sheet pan in one layer. Roast them for 30 to 45 minutes, turning once, until they turn deep brown. Chicken bones need less time than big beef bones.
Next, scrape up the brown bits on the pan. Pour a little hot water on the pan and loosen them with a spatula. Then add that liquid to the pot, since it holds a lot of flavor.
Now for the old-fashioned vinegar trick. Many traditional cooks add a splash of vinegar to the cold water before the bones simmer.
So what is a good bone broth vinegar amount? Most home recipes use about 1 to 2 tablespoons of apple cider vinegar for a full pot. The taste fades as the broth cooks, so most people never notice it.
You can skip the vinegar if you dislike it. However, many cooks keep it as a family habit.
Stovetop Bone Broth Method
The stovetop gives you the most control. Plan for a long, quiet day at home.
- Put the roasted bones in a large stockpot.
- Add cold water to cover the bones by about 2 inches.
- Stir in 1 to 2 tablespoons of apple cider vinegar.
- Let the pot sit for 30 minutes before you turn on the heat.
- Bring it slowly to a boil over medium heat.
- Skim off any foam that rises to the top.
- Turn the heat down to the lowest simmer, with just a few small bubbles.
- Simmer chicken bones for about 8 to 12 hours, or beef bones for about 12 to 24 hours.
- Add the vegetables and herbs for the last 2 to 3 hours.
- Top up with hot water if the bones poke out.
Keep the simmer gentle. A hard boil can make the broth cloudy and greasy. Also, stay home while the pot is on the stove, and keep the handle turned in.
If you need to sleep, switch off the heat and cool the pot quickly. Do not leave it out on the counter overnight. The cooling section below explains why.
Slow Cooker Bone Broth Method
A slow cooker makes this an easy, hands-off project. It suits busy days.
The USDA says a slow cooker cooks food slowly at a low temperature, generally between 170°F and 280°F. Its steady heat and closed lid suit a long simmer.
Here is how to make slow cooker bone broth:
- Put the thawed, roasted bones in the slow cooker.
- Add water to cover, leaving about 1 inch of space at the top.
- Stir in 1 tablespoon of apple cider vinegar.
- Cover and cook on high for the first hour, if you can.
- Turn it to low and cook for about 12 to 24 hours.
- Add the vegetables and herbs for the last few hours.
- Strain, cool, and store right away.
The first-hour tip also comes from the USDA. It suggests the highest setting for the first hour when possible. Still, the agency says cooking on low the whole time is safe.
Keep the lid in place, too. Lift it only to check or top up the water. That way, slow cooker bone broth stays hot and steamy.
Straining, Cooling, and Skimming
Strain the broth while it is still hot. Then cool it fast.
Set a fine strainer over a large bowl. For extra-clear broth, line it with a clean cloth. Pour carefully, and lift out the big bones with tongs first.
Cooling matters most here. The USDA leftovers guide says bacteria grow fast between 40°F and 140°F. It also says to refrigerate leftovers within 2 hours of cooking.
A big pot of soup cools slowly, so the USDA suggests splitting it into smaller, shallow containers. You can also set the bowl in an ice or cold water bath first. Then move the containers straight to the fridge.
Once cold, a layer of fat may form on top. You can lift it off with a spoon if you prefer a lighter broth. Either way, the broth below may now look like jelly. That is the gel test, and it comes next.
The Bone Broth Gel Test
The gel test is a simple kitchen check. Cold broth that wobbles shows good body.
Gel forms when gelatin from connective tissue melts into the hot liquid. As the broth chills, that gelatin sets, much like a dessert gel. So a firm bone broth gel means you used plenty of feet, wings, knuckles, or other gelatin-rich parts.
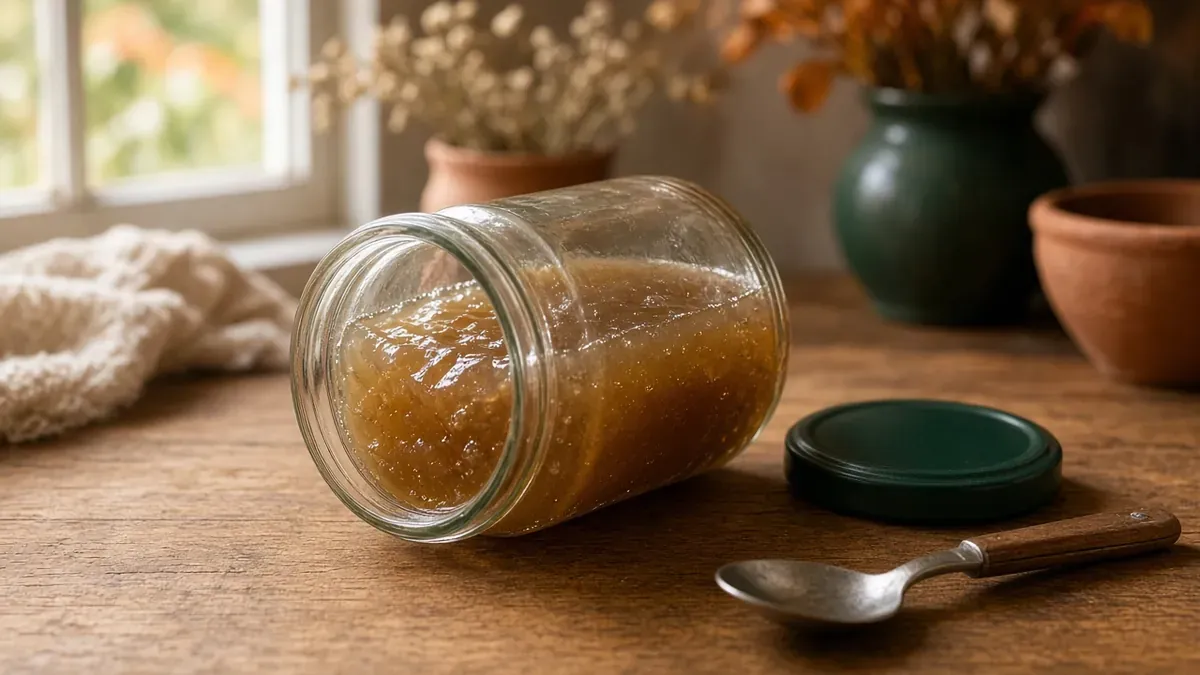
To test it, chill a small jar of broth overnight. Then tip the jar.
- Firm gel: It holds its shape and jiggles. You nailed it.
- Soft gel: It moves slowly, like loose jam. That is still great.
- No gel: It stays liquid. The flavor can still be good.
No bone broth gel? Don't worry. Next time, add more feet or wings, use less water, or keep the simmer gentle. Too much water is the most common reason the broth stays thin.
Once you heat it, the gel melts back into a smooth liquid. So a strong bone broth gel is about texture and body, not about safety.
How to Store and Freeze Bone Broth
Plan your storage before the pot is done. Fresh broth does not last long in the fridge.
The FoodSafety.gov cold storage chart lists soups and stews at 3 to 4 days in the fridge at 40°F or below. For the freezer, it lists 2 to 3 months. It also notes that freezer times are for quality only, since food kept at 0°F or below stays safe.
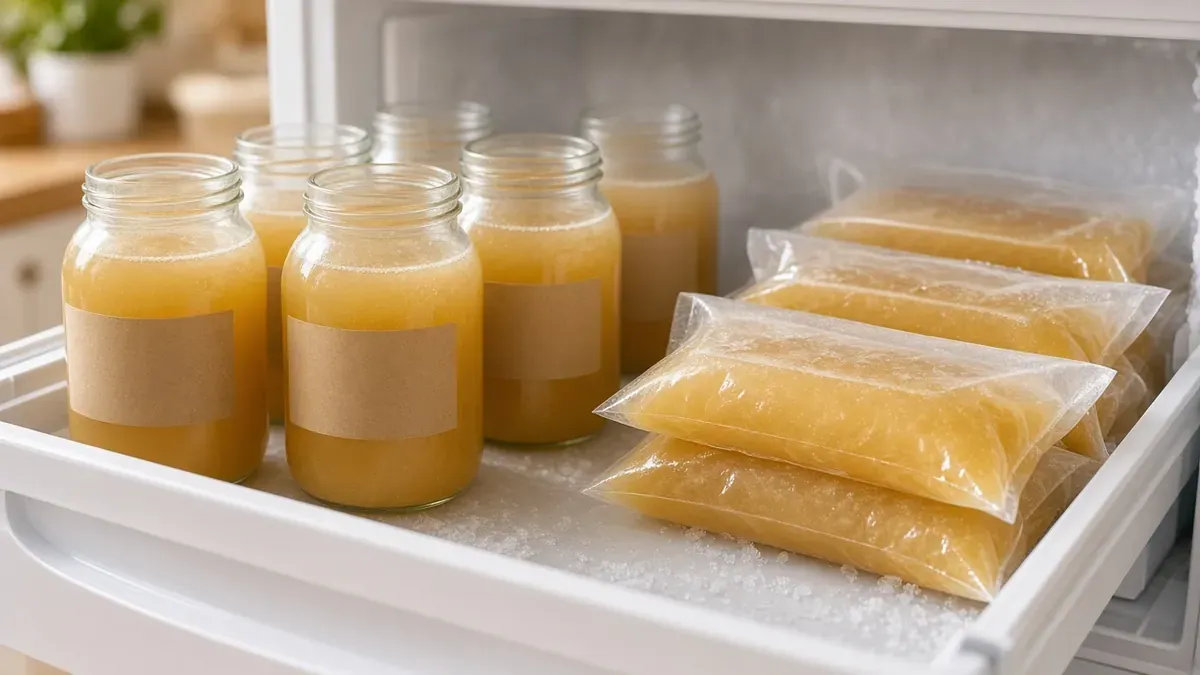
To freeze bone broth, follow these steps:
- Cool the broth quickly in shallow containers.
- Pour it into freezer-safe jars, bags, or containers.
- Leave room at the top, since liquid grows as it freezes.
- Label each one with the date.
- Freeze flat bags so they stack neatly.
Small portions help, too. Pour some broth into ice cube trays, freeze, and pop the cubes into a bag. Then you can add a few cubes to a pan sauce.
To thaw, use the fridge, cold water, or the microwave. The USDA also says you can reheat frozen soup in a saucepan without thawing it first.
Food Safety Basics
A few rules keep your broth safe. They are simple, but they matter.
- Reheat to a boil. The USDA says to reheat sauces, soups, and gravies by bringing them to a rolling boil.
- Reach 165°F. The USDA says reheated leftovers should reach 165°F on a food thermometer.
- Skip slow cooker reheating. The USDA does not recommend reheating leftovers in a slow cooker. Instead, reheat on the stove first.
- Mind the 2-hour rule. Throw out broth left at room temperature for more than 2 hours, or 1 hour above 90°F.
- Watch for power cuts. If the power goes out while you are away, the USDA says to throw the food out, even if it looks done.
Also, keep raw bones away from foods you will not cook. Wash your hands, boards, and tools after you handle them.
Common Mistakes to Avoid
Most broth problems have easy fixes. Here are the big ones.
- Boiling too hard. A rolling boil makes cloudy, greasy broth. Keep it at a lazy simmer.
- Using too much water. Extra water thins the flavor and weakens the gel.
- Salting too early. Salt at the end, once the broth has cooked down.
- Skipping the roast. Raw bones work, yet roasted bones taste richer.
- Cooling the pot on the counter. Split it into shallow containers and chill it fast.
- Adding frozen bones to a slow cooker. Thaw them in the fridge first.
- Keeping it too long. Use fridge broth within 3 to 4 days, or freeze it.
Fix these, and your next pot will taste better and set firmer. Also, keep notes on each batch, so you can repeat what worked.
Who Should Be Careful
Broth is simple food, yet a few cautions apply. Read these before you start.
- Hot liquid burns: A full pot is heavy and very hot. Use oven mitts, strain slowly, and keep kids away from the stove.
- Unattended cooking: Stay home while the stovetop pot simmers. For a slow cooker, follow the maker's manual, keep the lid on, and set it on a stable, heat-safe surface.
- Salt and sodium: Salted broth can add up fast. The FDA sodium page says the Dietary Guidelines advise adults to keep sodium under 2,300 mg a day. So salt lightly, or leave it out.
- Food allergies or sensitivities: Check every added item, such as celery, garlic, or spice blends.
- People at higher risk: FoodSafety.gov lists adults 65 and older, children under 5, pregnant women, and people whose immune systems are weakened by illness or medical treatment as more likely to get food poisoning. For them, careful cooling and reheating matter even more.
When to See a Doctor
Most mild stomach upsets pass on their own. However, some signs need a doctor.
FoodSafety.gov lists common food poisoning symptoms such as upset stomach, cramps, nausea, vomiting, diarrhea, fever, and dehydration. The CDC says to see a doctor if you have severe symptoms, including:
- Bloody diarrhea.
- Diarrhea that lasts more than 3 days.
- A fever over 102°F.
- Vomiting so often that you cannot keep liquids down.
- Signs of dehydration, such as peeing very little, a dry mouth, or feeling dizzy when you stand.
The CDC also advises pregnant people with a fever and flu-like symptoms to see their doctor. If symptoms feel severe or life-threatening, call 911 or go to the nearest emergency room.
Also, talk with your doctor before adding broth often if you follow a special diet. For example, people told to limit sodium or potassium should ask first.
Bone Broth FAQ
How long should bone broth simmer?
Most home recipes simmer chicken bones for about 8 to 12 hours. Beef bones often go for 12 to 24 hours.
Bone broth vs stock: what is the difference?
The broth usually simmers longer and uses more bony parts. Stock often cooks for a shorter time.
Why didn't the broth turn into a bone broth gel?
Usually, there was too much water or too few gelatin-rich parts. Add feet or wings next time.
Can you leave slow cooker bone broth on overnight?
Yes. The USDA says food stays safe while the cooker is working. Just cool and chill it right after.
How long does homemade broth keep in the fridge?
FoodSafety.gov lists 3 to 4 days for soups and stews. For longer storage, freeze it.
Do you have to roast the bones?
No. Roasting adds a deeper, toasty taste and a darker color. Still, raw bones make a lighter, clean broth.
Ways to Enjoy Your Broth on Cold Nights
Now you have the whole old-fashioned method. A full freezer gives you many easy meals. Here are simple ideas.
First, try it plain. Heat a mug, add a pinch of salt, and sip it slowly on a cold evening. A squeeze of lemon or a few chopped herbs add a fresh lift. If you like long stovetop projects, try this homemade elderberry syrup recipe next.
Next, use it as a base for soup. Chicken noodle, vegetable, or bean soups all taste deeper with homemade broth. Simply swap it in for water or boxed stock. For a fall twist on squash soup, stir in a pinch of homemade pumpkin pie spice.
You can also cook grains in it. Rice, barley, and lentils soak up the flavor as they cook. As a result, a plain side dish suddenly tastes rich. For a tangy topping, add a spoonful from these easy fall ferments.
Finally, use it in pan sauces and gravy. A few frozen cubes melt fast in a hot pan. Then you can scrape up the brown bits and stir in a little butter.
To recap, pick good bones, roast them, and add a splash of vinegar. Then simmer low and slow on the stove, or let slow cooker bone broth do the work. Cool it fast, check for gel, and freeze what you won't use soon.
Above all, follow the food safety steps every time. Chill within 2 hours, use it within 3 to 4 days, and bring it to a rolling boil when you reheat. Then pour a warm mug, or start a pot of soup, and enjoy the cozy season.
Old-Fashioned Bone Broth (Stovetop or Slow Cooker)
Roasted bones simmered low and slow with a splash of apple cider vinegar for a rich, golden broth that gels when chilled.
Ingredients
- 3 to 4 pounds beef or chicken bones
- About 4 quarts cold water, enough to cover
- 1 to 2 tablespoons apple cider vinegar
- 1 large onion, halved
- 2 carrots, in chunks
- 2 celery stalks
- 1 head garlic, halved
- 2 bay leaves
- 1 teaspoon black peppercorns
- Salt to taste, at the end
Steps
- Heat the oven to 425°F. Roast the bones in one layer for 30 to 45 minutes, turning once, until deep brown.
- Loosen the browned bits on the pan with a little hot water and add that liquid to a large stockpot with the bones.
- Cover the bones with cold water by about 2 inches, stir in the apple cider vinegar and let the pot sit for 30 minutes.
- Bring slowly to a boil over medium heat and skim off the foam.
- Lower the heat to the gentlest simmer. Simmer chicken bones for about 8 to 12 hours or beef bones for about 12 to 24 hours, topping up with hot water if the bones poke out.
- Add the onion, carrots, celery, garlic, bay leaves and peppercorns for the last 2 to 3 hours.
- Strain the hot broth through a fine strainer, divide it into shallow containers and refrigerate within 2 hours.
- Lift off the fat once cold if you like, and add salt when you use the broth.
Notes: Slow cooker: use thawed roasted bones, cover with water leaving 1 inch of space, add 1 tablespoon of vinegar, cook on high for the first hour, then on low for 12 to 24 hours. Fridge: 3 to 4 days. Freezer: 2 to 3 months for best quality (FoodSafety.gov).
You may also like
Elderberry Syrup Recipe: Stovetop Method, Storage & Evidence
A practical elderberry syrup recipe: simmer dried berries, strain, add honey after cooling, then learn fridge and freeze…

Kitchen Herbal Apothecary: 12 Fall Jars You'll Use
A practical fall pantry shelf: twelve dried-herb jars, restock cues, amber-or-mason storage tips, and weekly brew habits…