Elderberry Syrup Recipe: Stovetop Method, Storage & Evidence
A practical elderberry syrup recipe: simmer dried berries, strain, add honey after cooling, then learn fridge and freezer storage and what the evidence says.
Jump to recipe ↓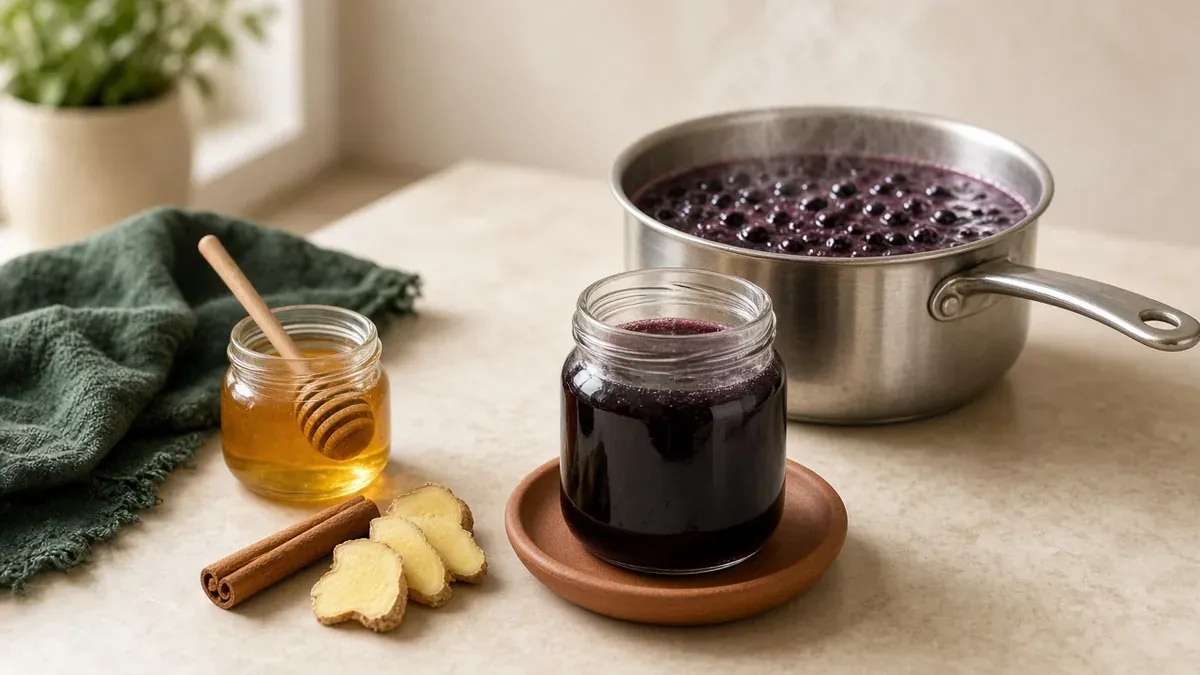
In this article
- What Elderberry Syrup Is (and Isn't)
- Ingredients for This Elderberry Syrup Recipe
- Equipment You Need
- Step-by-Step Stovetop Elderberry Syrup Recipe
- Flavor Tips and Variations
- How Long Does Elderberry Syrup Last?
- Elderberry Syrup Benefits: What the Evidence Says
- From Our Garden
- Who Should Be Careful
- When to See a Doctor
- Common Mistakes With an Elderberry Syrup Recipe
- Elderberry Syrup Recipe FAQ
- The Bottom Line on Your Next Batch
A good elderberry syrup recipe needs only a few pantry staples and one patient afternoon at the stove. This elderberry syrup recipe simmers dried berries in water, strains them, and stirs in honey once the liquid cools. You also get the parts most recipe cards skip.
For instance, you learn how long the syrup keeps and how to freeze it. You also see what research actually shows, and the answer stays modest. Moreover, you learn who should skip homemade syrup entirely.
This guide speaks to adults only, because honey never belongs in a baby's diet. Think of it as a kitchen project with an honest label, not a medicine cabinet fix.
What you will get from this guide:
- A simple stovetop method with dried elderberries, water, and honey.
- An ingredient table plus the gear you actually need.
- Clear storage rules, including fridge time and freezing.
- An honest research summary from federal health sources.
- Safety notes on raw berries, honey, medicines, and pregnancy.
- Quick FAQ answers for common batch questions.
What Elderberry Syrup Is (and Isn't)
Elderberry syrup starts as a simple fruit concentrate. You simmer dark berries, strain them, and sweeten the liquid.
Many recipes use black elderberry, Sambucus nigra, the species the NCCIH elderberry fact sheet describes. The berries taste tart and earthy, so honey rounds them out. As a result, the finished syrup tastes a bit like a tangy berry jam thinned with water.
People have used elderberry in folk practice for colds and flu for generations. However, folk use and solid evidence differ. Today, stores sell many elderberry products as dietary supplements. NCCIH notes that supplement rules run less strict than drug rules.
So what does a homemade elderberry syrup recipe give you? First, it gives you a flavorful syrup you control, with no mystery fillers. Second, it gives you a cozy kitchen ritual for cold season.
It does not give you a medicine, though. Instead, think of it as a food you might enjoy in tea, over yogurt, or by the spoonful.
Here is what the syrup is not:
- A replacement for a yearly flu shot.
- A substitute for medical care when you feel very sick.
- For babies under 1 year: never give it, because it contains honey.
- A shelf-stable product you can leave in the pantry.
Keep those limits in mind as you cook.
Ingredients for This Elderberry Syrup Recipe
You need only a short list. The base follows a University of Maine Cooperative Extension version that makes about 2 cups.
| Ingredient | Amount | Role |
|---|---|---|
| Dried elderberries | 1 cup | Main flavor and deep color |
| Water | 4 cups | Simmering liquid that reduces by about half |
| Honey | 1/2 cup, or to taste | Sweetness and body; add after cooling |
| Cinnamon stick | 1 (optional) | Warm, sweet spice note |
| Fresh ginger | 2 teaspoons, finely chopped (optional) | Gentle heat |
| Ground cloves | 1/4 teaspoon (optional) | Deep, warm aroma |
Have fresh or frozen berries instead? The same extension recipe swaps in 2 cups. However, fresh berries need extra work, because you must pick out every leaf and stem first. Dried berries skip that chore, so they suit a first batch.
Buy dried elderberries from a seller you trust, and check that the label names the species. Also, never use red elderberries for this elderberry syrup recipe. Oregon State University Extension notes that red elderberries may carry more toxins, especially in the seeds. OSU advises against making food products from them.
This recipe is written for store-bought dried berries. If you pick wild elder, first review these beginner foraging safety rules, and cook only berries you have identified with 100% certainty.
As for honey, any mild variety works. Meanwhile, maple syrup or sugar can stand in if you prefer. The UMaine page lists all three as common sweeteners for tart elderberries.
Equipment You Need
Good news: your kitchen probably has everything already. Gather these tools before you start this elderberry syrup recipe:
- A medium saucepan, ideally stainless steel.
- A wooden spoon or heatproof spatula.
- A fine-mesh sieve, plus cheesecloth for a clearer syrup.
- A large bowl or measuring jug to catch the liquid.
- A clean glass pint jar with a tight lid.
- A funnel for tidy pouring.
- Ice cube trays or small freezer containers, if you plan to freeze.
Clean jars matter more than fancy gear. The UMaine recipe sterilizes the glass jar while the syrup reduces. You boil it, fully submerged, for 10 minutes. That step takes little effort, and it gives your syrup a cleaner start.
Also, wash your hands and wipe your counters before you begin. Homemade syrup spoils faster than you might expect.
One more tip: pick a pan with room to spare. Elderberry juice stains, so a roomy pot keeps splashes off your stovetop. Likewise, keep an old dish towel nearby.
Step-by-Step Stovetop Elderberry Syrup Recipe
This method takes patience more than skill. Read every step once before you start.
- Wash your hands and clear a clean workspace.
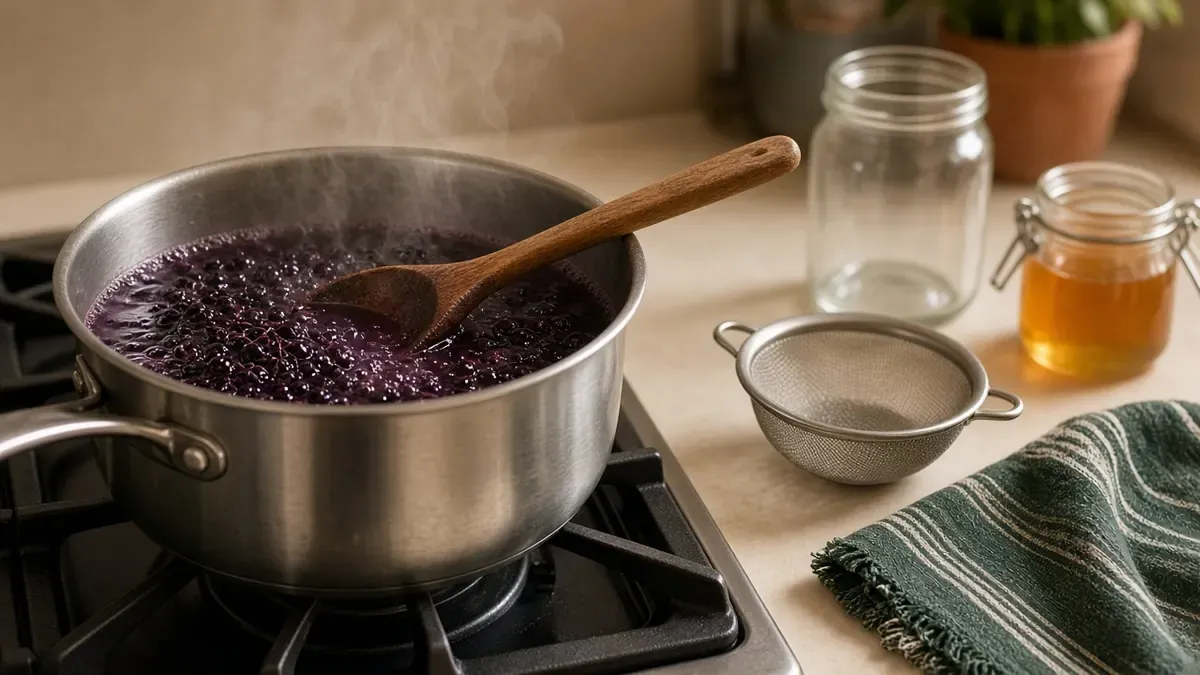
- Add the dried elderberries, water, and any spices to the saucepan.
- Bring the pot to a boil over medium-high heat.
- Lower the heat and simmer, stirring now and then.
- Keep simmering until the liquid drops to about half its starting level.
- Meanwhile, boil your glass jar, fully submerged, for 10 minutes.
- Turn off the heat and mash the berries gently with the spoon.
- Strain the mixture through a fine-mesh sieve into a bowl or jug.
- Press the berries lightly, then discard the solids.
- Let the liquid cool until it feels only warm, or reaches room temperature.
- Stir in the honey until it dissolves completely.
- Pour the syrup into the clean jar, seal it, and refrigerate.
That full boil and steady simmer matter. NCCIH notes that cooking eliminates the cyanide-producing substances in raw or unripe berries. So never skip or shorten the cooking stage of any elderberry syrup recipe.
Why wait to add honey? Many cooks prefer to keep honey away from boiling heat for flavor reasons. In addition, the UMaine version cools the syrup to room temperature first, so you follow a tested order.
Watch the pot rather than the clock. Your stove, pan width, and altitude all change how fast water evaporates. Once the liquid looks about half gone, your elderberry syrup recipe has reached the right point.
Flavor Tips and Variations
Once you master the base, small tweaks keep things interesting. Try one change per batch so you learn what you like.
Popular add-ins:
- Ginger: adds gentle warmth and a slight bite.
- Cinnamon: brings a sweet, cozy depth.
- Cloves: go a long way, so start small.
- Lemon: a strip of peel in the pot or a squeeze of juice at the end brightens the taste.
- Star anise or cardamom: add a subtle, aromatic twist.
Prefer a honey-free version? Maple syrup works well and gives a rounder, caramel note. Likewise, plain sugar dissolves easily and keeps the berry flavor front and center. Both swaps follow the same steps, so your elderberry syrup recipe stays simple.
Want a thicker texture? Simmer a little longer so more water evaporates. Conversely, if your syrup turns out too thick, stir in a spoonful of cooled boiled water.
For serving, you have plenty of options. For example, drizzle the syrup over oatmeal or yogurt. You can also stir it into hot tea or mix it with sparkling water for a tart spritzer. The UMaine page mentions a spoonful, tea, or sparkling water as easy ways to enjoy it.
Keep add-ins simple. Stick to whole spices and fresh fruit from your pantry. Then your elderberry syrup recipe will taste clean and bright every time. For more pantry jar ideas, browse our kitchen herbal apothecary guide.
How Long Does Elderberry Syrup Last?
Short answer: not long in the fridge. Plan small batches.
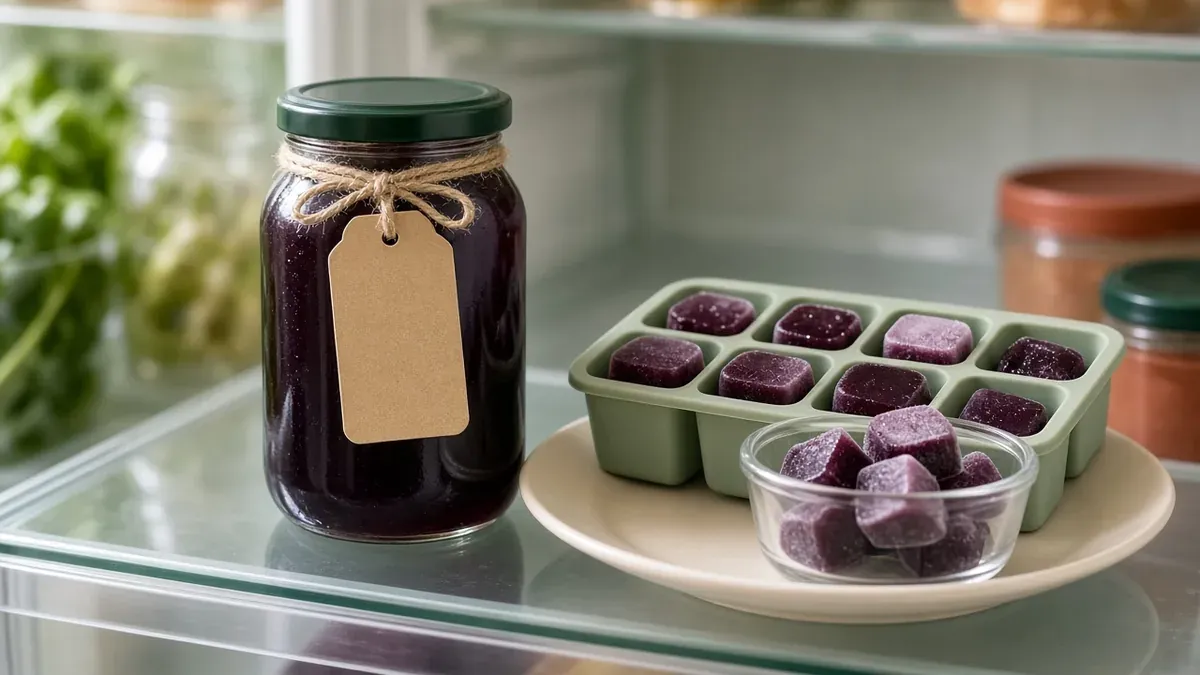
So, how long does elderberry syrup last once you jar it? The University of Maine Cooperative Extension advises keeping homemade syrup in the refrigerator and using it within 2 weeks. For longer storage, the same page suggests freezing it for up to 8 months for best quality.
Why so short? Homemade syrup has no commercial preservatives. Also, elderberries carry little natural acid. In fact, UMaine explains that elderberries lack the acidity to can like other berries.
Several varieties tested at or above the pH 4.6 cutoff for boiling water bath canning. Therefore, skip canning and stick with the fridge or freezer. Because the window runs short, size each elderberry syrup recipe batch to what you will use in two weeks.
Freezing made easy:
- Pour cooled syrup into ice cube trays.
- Freeze until solid, then move the cubes to a labeled freezer bag.
- Thaw one or two cubes in the fridge as you need them.
- If you freeze syrup in jars, leave about 1 inch of headspace, as Oregon State University Extension advises.
Signs your syrup has spoiled:
- Fuzzy spots or a film of mold on top.
- Fizzing, bubbles, or a bulging lid.
- A sour, yeasty, or otherwise off smell.
- Cloudiness or slime that was not there before.
If you notice any of these, throw out the whole jar. Don't scoop off mold and keep going. Also, label each jar with the date you made it. That small note answers "how long does elderberry syrup last" at a glance every time you open the fridge.
Elderberry Syrup Benefits: What the Evidence Says
Let's look honestly at the research. It is small, mixed, and still open.
According to the NCCIH elderberry fact sheet, only a small number of studies have looked at elderberry. They cover colds, flu, and other upper respiratory infections. NCCIH describes that research on symptoms as preliminary. However, NCCIH also says there's not enough information to show whether elderberry helps with any other health purposes.
The flu picture looks even thinner. NCCIH's page on colds, flu, and complementary approaches lists elderberry among options without enough evidence to show whether they help with flu. Furthermore, that page says complementary approaches should never replace flu vaccination.
So what can you fairly say about elderberry syrup benefits?
- Some small studies suggest a possible effect on symptoms, but results vary.
- Researchers still disagree about how much elderberry helps, if at all.
- Homemade batches vary in strength, so study findings may not match your jar.
- No good evidence supports elderberry for COVID-19, per NCCIH.
Also, NCCIH reports that the FDA and FTC took action against some companies. Those companies marketed elderberry products with unsupported COVID-19 claims. That history gives you a good reason to read bold labels with healthy doubt.
Above all, the realistic elderberry syrup benefits look like this: a tasty, tart syrup you enjoy, made with ingredients you chose. Any effect beyond that remains an open question, so no elderberry syrup recipe can promise you fewer or shorter colds. For flu, NCCIH calls the yearly vaccine the best protection.
From Our Garden
This note comes from a different syrup. It involves lemon and honey, not elderberry.
The site owner made a homemade lemon and honey syrup. Here is that reflection, word for word:
From Our Garden
I've made a homemade lemon and honey syrup, and I found it soothing, especially for my throat.
That is one person's experience, not proof, and your results may vary.
Notice what this does and does not tell you. It describes a lemon-honey batch, so it says nothing about elderberry itself. Separately, the CDC's common cold page lists honey for cough as a self-care step. That tip applies to adults and children at least 1 year old.
Who Should Be Careful
Read this list before you try any elderberry syrup recipe. Homemade syrup does not suit everyone.
- Anyone using raw or undercooked berries: NCCIH warns that raw or unripe elderberries, plus leaves and stems, contain cyanide-producing substances. These can cause nausea, vomiting, and severe diarrhea. Memorial Sloan Kettering also notes poisoning from elder bark, leaves, and raw berries. So cook berries thoroughly, remove every stem, and never eat leaves, bark, or unripe fruit. Raw berries, seeds included, always need full cooking.
- Babies under 1 year: Never give honey to an infant. NCCIH explains that honey may contain spores of the bacterium behind infant botulism. The CDC describes botulism as a medical emergency. This recipe and article address adults only.
- Pregnancy and breastfeeding: NCCIH says little is known about safety here, and Memorial Sloan Kettering advises avoiding elderberry during pregnancy or while breastfeeding. Ask your clinician first.
- Autoimmune conditions: Lab studies suggest elderberry may influence immune activity. Memorial Sloan Kettering also lists a case report of autoimmune hepatitis linked to long-term elderberry supplement use. Talk with your specialist.
- People taking medicines: That includes diabetes medications, diuretics, laxatives, and others. MSK notes possible additive effects with diabetes drugs, diuretics, and laxatives. If you take immunosuppressants, ask your specialist first, because lab studies suggest elderberry may influence immune activity. NCCIH advises talking with your provider before using elderberry with any medicine. A pharmacist can check interactions, too.
- People with allergies: MSK lists allergy to elderberry as an infrequent reaction. Stop if you notice itching, hives, or swelling.
Also, if you manage blood sugar, remember that honey adds sugar. Count it like any other sweet.
When to See a Doctor
No elderberry syrup recipe belongs in place of medical care. Know these warning signs.
The CDC's common cold guidance says to seek medical care for:
- Trouble breathing or fast breathing.
- Dehydration.
- A fever that lasts longer than 4 days.
- Symptoms that last more than 10 days without getting better.
- Fever or cough that improves, then returns or worsens.
- Chronic medical conditions that get worse.
For adults with flu, the CDC's flu warning signs page adds urgent signs. These include difficulty breathing, shortness of breath, and persistent pain or pressure in the chest or abdomen. Persistent dizziness, confusion, seizures, not urinating, and severe weakness also call for care right away.
Some people face higher risk from flu. According to the CDC, that group includes adults 65 and older and pregnant people. It also includes people with chronic conditions such as asthma, diabetes, or heart disease. If you fall into one of these groups, contact your provider early, even for mild illness. The CDC notes that prescription flu medicines work best when you start them soon after symptoms begin.
Finally, stop the syrup and call a clinician if you notice any reaction after taking it. Examples include vomiting, diarrhea, a rash, or swelling. If symptoms feel severe, seek emergency care.
Common Mistakes With an Elderberry Syrup Recipe
Most batch problems trace back to a few habits. Avoid these and your syrup improves fast.
- Skipping the full simmer. Cooking reduces the natural toxins in elderberries, so a quick warm-up falls short.
- Leaving stems in fresh berries. OSU Extension notes that stems and leaves hold higher toxin levels.
- Adding honey to boiling liquid. Let the syrup cool first, as the extension method does.
- Using red elderberries. OSU advises against food products from this species.
- Canning the syrup. Elderberries lack enough acid for standard home canning, according to UMaine.
- Storing it in the pantry. Homemade syrup needs the fridge or freezer.
- Making a giant batch. You only get about 2 weeks in the fridge, so small batches waste less.
- Giving it to a baby. Honey never belongs in an infant's diet.
Another common slip involves expectations. A homemade elderberry syrup recipe makes a pleasant food, but it cannot replace a flu shot or a doctor visit.
Finally, double-check your berries' source. A reputable seller and a clear label lower the risk of mix-ups with other plants.
Elderberry Syrup Recipe FAQ
Here are quick answers to common questions.
How long does elderberry syrup last in the fridge?
UMaine Extension suggests using it within 2 weeks. Freeze it for longer storage, up to 8 months for best quality.
Can I use fresh elderberries in this elderberry syrup recipe?
Yes. Use about 2 cups of fresh or frozen berries instead of 1 cup dried. Remove all stems and leaves, then cook thoroughly.
Can I can elderberry syrup for the pantry?
No. UMaine reports that several elderberry varieties tested too low in acid for standard canning. Freeze extra syrup instead.
What are realistic elderberry syrup benefits?
NCCIH says only a small number of studies exist, and the findings are preliminary. Enjoy it as a food, not a medicine.
How much should I take?
Many home recipes suggest a spoonful or a splash in tea. However, ask your clinician what makes sense for you, especially if you take medicines.
Can kids have this syrup?
This guide covers adults only. Never give honey to babies under 1 year, and ask a pediatrician about anything for children.
Can I skip the honey?
Yes. Maple syrup or sugar works well. Add it after cooling, just like honey.
The Bottom Line on Your Next Batch
Elderberry syrup rewards a calm afternoon and a clean kitchen. Keep your expectations honest.
You now have a simple stovetop elderberry syrup recipe, a clear storage plan, and a fair read on the research. Cook berries thoroughly, strain well, and add honey after cooling. Then refrigerate the jar and use it within about 2 weeks, or freeze cubes for later.
Remember the evidence picture, too. NCCIH says the research remains small and preliminary. Meanwhile, NCCIH calls the yearly flu vaccine the best protection against flu.
Like seasonal jar projects? You can also try easy fall ferments for comfort meals.
Before your next batch, run through this quick checklist:
- Dried black elderberries from a trusted seller.
- A clean jar and a date label.
- Honey or maple syrup, ready for after cooling.
- Room in the fridge or freezer.
Make each elderberry syrup recipe batch small, taste as you go, and adjust spices to your liking. Above all, check with your clinician if you take medicines or have a health condition. A good elderberry syrup recipe belongs in your kitchen, and good care belongs with your doctor.
Homemade Elderberry Syrup (Stovetop)
Dried black elderberries simmered with water and optional spices, strained, then sweetened with honey once cooled. For adults only.
Ingredients
- 1 cup dried black elderberries (Sambucus nigra)
- 4 cups water
- 1/2 cup honey, or to taste (maple syrup or sugar also work)
- 1 cinnamon stick (optional)
- 2 teaspoons fresh ginger, finely chopped (optional)
- 1/4 teaspoon ground cloves (optional)
Steps
- Add the dried elderberries, water and any spices to a medium saucepan.
- Bring to a boil over medium-high heat, then lower the heat and simmer, stirring now and then, until the liquid drops to about half its starting level.
- Meanwhile, boil a clean glass pint jar, fully submerged, for 10 minutes.
- Turn off the heat, mash the berries gently and strain through a fine-mesh sieve, pressing lightly. Discard the solids.
- Let the liquid cool until it is only warm or at room temperature, then stir in the honey until it dissolves.
- Pour the syrup into the clean jar, seal it and refrigerate.
Notes: Never skip or shorten the cooking: it removes the cyanide-producing substances in raw berries (NCCIH). Never use red elderberries. Contains honey: never give it to babies under 1 year. Keep it in the fridge.
You may also like
Bone Broth Recipe: Old-Fashioned Slow Cooker and Stovetop Methods
This old-fashioned bone broth recipe walks you through roasting bones, a splash of vinegar, stovetop and slow cooker met…

Kitchen Herbal Apothecary: 12 Fall Jars You'll Use
A practical fall pantry shelf: twelve dried-herb jars, restock cues, amber-or-mason storage tips, and weekly brew habits…